To guarantee your hearing aids function at their best and maintain their hygiene, it’s vital to establish a daily cleaning routine. Start by washing your hands, then use a soft-bristled brush to gently remove dirt and debris. Wipe the surfaces with a microfiber cloth to prevent moisture buildup. For deeper cleaning, use a wax removal tool and a dehumidifier. Regular professional check-ups are also important. By following these best practices, you can extend the lifespan of your hearing aids and ensure they continue to perform well. Let’s explore these steps further to keep your hearing aids in top condition.
Key Takeaways
- Daily cleaning routine includes washing hands, using a soft-bristled brush for the microphone, receiver, and battery compartment, and a microfiber cloth to wipe surfaces.
- Essential tools include a soft-bristled hearing aid brush, microfiber cloth, wax removal tool, and a drying kit or dehumidifier.
- Regularly inspect hearing aids for debris and earwax, focusing on delicate parts like microphones and receivers.
- Avoid using chemical solutions, water, alcohol, hydrogen peroxide, acetone, and bleach, which can damage hearing aids.
- Store hearing aids in a dry place, open the battery compartment at night, and schedule professional cleanings every 3 to 6 months.
Daily Cleaning Routine
Maintaining your hearing aids requires a daily cleaning routine to guarantee peak performance and hygiene. Let’s face it, these tiny devices live in your ears, and ears are dirty places. You really don’t want yesterday’s earwax hanging around, trust us. Cleaning your hearing aids daily is the best way to make certain they keep on working and don’t become a petri dish for bacteria.
Start by washing your hands thoroughly, because, well, you don’t want to transfer any unwanted guests to your hearing aids. Use a soft brush to gently remove any visible dirt or debris from the microphone and receiver openings and battery compartment. A microfiber cloth is your best friend here; it’s gentle and won’t scratch those delicate surfaces. Don’t forget to clean the dome or earmold if you have a behind-the-ear (BTE) model. And remember, the goal is to keep your hearing aids dry, so avoid any fluids. By making these daily habits part of your routine maintenance, you’ll keep your hearing aids in top shape and prevent any unwanted issues.
Handling Delicate Parts
Handling Delicate Parts
When cleaning your hearing aids, you’re working with delicate parts that require careful handling to avoid damage. You wouldn’t want to accidentally break something that’s meant to help you hear better, right? So, let’s explore how to handle these sensitive components with gentle techniques.
Delicate Components: Handle with Care
| Component | Cleaning Tool | Handling Tip |
|---|---|---|
| Microphone | Soft-bristled brush | Gently sweep away debris. Never push the brush into the microphone ports. |
| Receiver | Microfiber cloth | Wipe down the receiver with soft strokes. Avoid using force that might push debris further in. |
| Battery Compartment | Dry cloth | Open the battery compartment at night to let it air out. This helps extend battery life and prevent moisture buildup. |
Cleaning ITE Hearing Aids

Cleaning ITE (in-the-ear) hearing aids requires attention to detail and the right tools. You’ll need a soft-bristled brush, a wax pick or loop, and a microfiber cloth to keep your devices in top shape. Start by gently brushing the microphone cover, receiver, and vent openings to remove any wax or debris. Don’t push too hard, as you might damage the delicate parts. Next, use the wax pick or loop to remove any stubborn deposits or wax buildup from the air vent. Be gentle, as you don’t want to push wax further in.
For larger vents, run a vent cleaner carefully through the opening in each direction. Finally, wipe down the entire hearing aid with a soft cloth. Remember, never use water, alcohol, or chemical wipes to clean an ITE hearing aid. Good hearing aid hygiene is key to keeping your devices working properly. Regular earwax management will also help prevent clogs and guarantee you hear clearly. Take a few minutes each day to clean your ITE hearing aids, and they’ll reward you with years of reliable service.
Cleaning BTE Hearing Aids
Cleaning BTE (behind-the-ear) hearing aids involves a few simple steps. Start by examining the device for any visible debris or earwax. Use a soft brush to gently remove any buildup from the microphone and receiver openings. Then, use a wax loop or pick to remove any stubborn deposits or wax buildup. Be careful not to push wax or dirt into the openings. Next, clean the ear mold and tubing. Remove the ear mold from the hook and wash it with warm, soapy water. Allow it to dry completely before reattaching it to the hearing aid. Use a bulb blower to force out any excess water from the tubing.
To maintain sound quality and prevent damage, it’s essential to prioritize moisture control. Use a dehumidifier or drying kit every night to remove any moisture from your devices. This will help prevent damage and guarantee your hearing aids continue to work properly. By following these steps, you’ll be able to keep your BTE hearing aids clean, dry, and functioning at their best. Remember, cleaning your hearing aids is not a chore, it’s a necessity.
Common Cleaning Tools
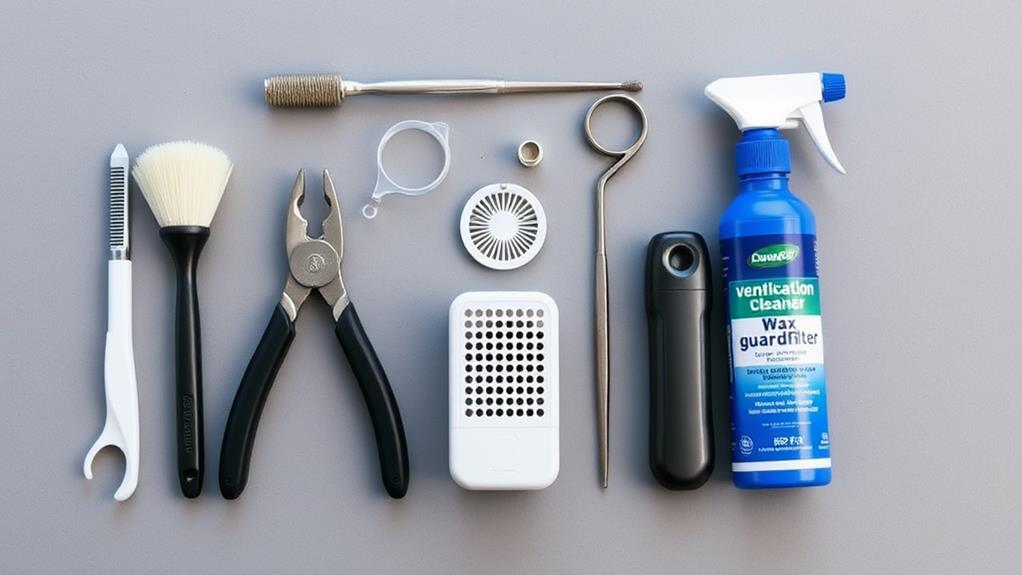
To effectively clean your hearing aids, you’ll need a variety of specialized tools designed to handle the delicate parts of your device. First, there’s the hearing aid brush – a soft-bristled buddy that gently removes earwax, debris, and dirt from the exterior surfaces of your hearing aid, including the battery compartment, microphone openings, and receiver/speaker. Use it daily to keep your device in top shape. Next up is the microfiber cloth, which you’ll use to wipe the surface of your hearing aid after every use. This helps remove dust, oils, sweat, and other moisture without scratching the delicate components.
For those pesky nooks and crannies, you’ll need a wax removal tool. A wax pick, wax loop, or other specialized tool will help you remove earwax buildup without damaging your hearing aid. Don’t forget the tubing wire cleaner, which comes with some hearing aids. It’s got a thin wire or threader on one end and a brush on the other, allowing you to gently remove earwax and debris. Finally, there’s the drying kit or dehumidifier, which removes moisture to prevent damage and keep your hearing aids working properly.
Avoiding Chemical Solutions
Chemical solutions can be detrimental to your hearing aids. You might think they’re a good idea for cleaning, but trust us, they’re not. Here’s why:
| Chemical | Why It’s Bad | Natural Alternatives |
|---|---|---|
| Alcohol | Dries out parts | Microfiber cloth |
| Hydrogen Peroxide | Damages electronics | Soft-bristled brush |
| Acetone | Melts plastic components | Dry cloth |
| Bleach | Corrodes metal parts | Air blower or dryer |
These chemical solutions can damage the delicate electronics inside your hearing aids. Instead, opt for natural cleaners like microfiber cloths, soft-bristled brushes, and dry cloths. These won’t harm your hearing aids and will keep them running smoothly.
When cleaning your hearing aids, stick to the basics. Use a soft cloth to wipe down the exterior and a brush to clean out any debris. Avoid using chemical cleaners or wipes, as they can damage the sensitive electronics. Your hearing aids are an investment, so take care of them with gentle cleaning and regular maintenance.
Weekly Deep Cleaning

You’re probably thinking, “Weekly deep cleaning of my hearing aids? That sounds like a chore!” But trust me, it’s crucial to keep them in top shape. Grab your cleaning tools, like a soft-bristle brush, wax pick, and microfiber cloth, and get ready to tackle the step-by-step process that’ll keep your hearing aids working like new.
Cleaning Tools Required
For weekly deep cleaning, gather the necessary tools to verify your hearing aids remain in peak condition. A good cleaning routine depends on the right tools and a bit of know-how. Here’s what you need:
| Tool | Use | Why It’s Important |
|---|---|---|
| Hearing Aid Brush | Remove dust, dandruff, and dirt from the exterior shell. | Keeps openings clear and prevents clogs. |
| Multitool | Brush, pick, and clean vents all with one handy tool. | Versatile and essential for all cleaning tasks. |
| Ventilation Cleaner | Remove moisture and earwax from vents. | Verifies vents stay clear for better sound. |
| Wax Guard/Filter | Replace every 1-2 months to prevent buildup. | Prevents malfunctions due to wax clogs. |
| Dehumidifier | Store hearing aids overnight to remove moisture. | Extends device life by preventing damage. |
With these tools, you can give your hearing aids the TLC they need. Remember, regular cleaning is key to keeping them in top shape. Don’t skip the daily basics, and make sure to store them in a dehumidifier overnight to keep moisture at bay. Your hearing aids will thank you.
Step-by-Step Cleaning Process
Weekly deep cleaning of your hearing aids is essential for maintaining their performance and longevity. You wouldn’t neglect your car’s oil changes, so don’t neglect your hearing aids’ regular maintenance. Start by gathering your cleaning tools, which should include a wax removal brush, a soft, clean, dry cloth, a wax pick/wire loop, and a vent cleaner. These tools are designed to be gentle on your hearing aids while effectively removing debris and wax.
Begin by gently brushing the microphone cover with the wax removal brush to remove any wax or debris that may have accumulated overnight. Next, use the soft cloth to wipe down the entire hearing aid, paying special attention to areas where debris and wax are visible. For more stubborn deposits, use the wax pick/wire loop, but be careful not to push wax into the microphone or receiver ports. Finally, use the vent cleaner to guarantee that the vents are clear and functioning properly. Regular deep cleaning will help prevent damage and keep your hearing aids in top working condition.
Avoiding Damage Tips
When cleaning your hearing aids, it’s vital to avoid damaging the delicate components. Think of them like your car – you wouldn’t wash it with harsh chemicals or leave it out in the rain, right? Similarly, avoid using chemical solutions or wipes that aren’t made for hearing aids, and never get water on the device. This can damage the sensitive electronics and render your hearing aids useless.
To keep your hearing aids in top condition, it’s important to control moisture. Store them in a dry, safe place at night, and consider using a dehumidifier or dry box to remove any moisture buildup. Proper storage can extend the life of your hearing aids and prevent damage. Don’t store them in the bathroom, where steam from the shower can seep in, and avoid keeping them near sources of heat or cold. By following these simple tips, you can keep your hearing aids in great shape and guarantee they continue to help you hear clearly for years to come.
Dehumidifying Hearing Aids
To keep your hearing aids functioning ideally, dehumidifying them is crucial. Moisture control is key to preventing damage and guaranteeing your devices last longer. Here’s how you can do it:
- Use a dehumidifier: Invest in a hearing aid dehumidifier or drying kit to remove moisture overnight. This is especially important if you live in a humid climate or tend to sweat a lot.
- Dry the battery compartment: Open the battery compartment at night to let it air out. This helps prevent moisture buildup inside the device.
- Avoid water and alcohol: Never use water or alcohol to clean your hearing aids. These liquids can damage the sensitive electronics inside.
- Regular professional cleaning: Schedule professional cleanings every six months to guarantee thorough moisture removal and device maintenance.
Professional Maintenance
You need to schedule regular check-ups with a hearing professional to keep your hearing aids in top shape. They’ll use specialized cleaning tools to remove any deeply embedded dirt and wax, which helps extend the lifespan of your devices. By staying on top of professional maintenance, you can avoid costly repairs and guarantee your hearing aids keep working flawlessly.
Scheduling Regular Check-ups
Regular professional check-ups are vital for maintaining your hearing aids. Think of it like taking your car in for a tune-up – you want to make certain everything is running smoothly and catch any potential issues before they become major problems. Here’s what you need to do:
- Schedule reminders: Set reminders on your phone or calendar for every 3 to 6 months to guarantee regular check-ups.
- Professional cleaning: Your hearing care professional has the right tools and expertise to give your hearing aids a deep clean, removing any stubborn wax or debris that you might have missed.
- Performance testing: During your check-up, your hearing care professional will test your hearing aids to make sure they’re functioning at their best.
- Adjustments and repairs: If any issues are found, your hearing care professional can make the necessary adjustments or repairs to keep your hearing aids in prime condition.
Don’t skip these check-ups – they’re essential for keeping your hearing aids working effectively and extending their lifespan.
Professional Cleaning Tools
Professional cleaning tools are essential for maintaining your hearing aids. You can’t just use any old thing to clean them – that’s like trying to fix a Swiss watch with a hammer. You need the right tools for the job.
First off, you’ll need a good brush. There are different types of brushes for different types of hearing aids, so make sure you get the right one. You’ll also need a wax pick or wire loop to get rid of any stubborn earwax. And if you’ve got a behind-the-ear model, you’ll need a tube cleaning tool to keep the sound clear.
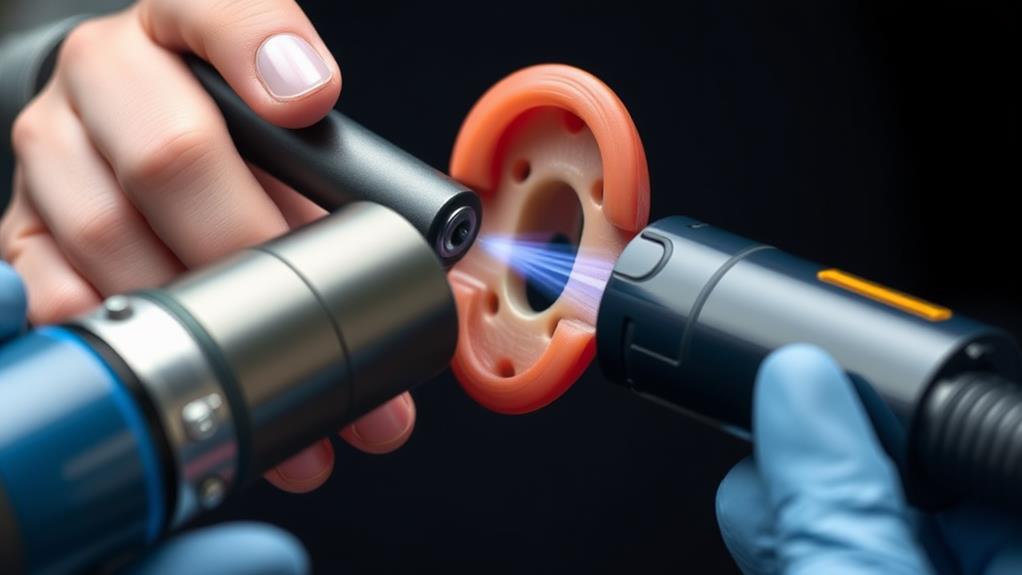
But the real MVPs are ultrasonic cleaners. These babies use high-frequency sound waves to blast away dirt and debris, leaving your hearing aids sparkling clean. They’re like a mini-vacation for your hearing aids. Just be sure to follow the manufacturer’s instructions, or you might end up damaging your devices. And remember, cleaning your hearing aids regularly is key to keeping them in top condition. So, get the right tools and get to work
Extending Device Lifespan
Daily maintenance is essential, but professional cleaning is equally important for extending the lifespan of your hearing aids. Think of it like taking your car in for a tune-up – you don’t want to skip it, or you might end up stranded with a busted engine. Same deal with your hearing aids – regular professional cleanings keep them running smoothly.
Here are some key things to focus on during professional cleanings:
- Deep cleaning: A professional can get into all the tiny nooks and crannies, removing dirt and wax that can cause problems.
- Battery care: They’ll check your batteries and make sure they’re not leaking acid or causing other issues.
- Moisture protection: They’ll use special tools to remove moisture that can damage your hearing aids.
- Adjustments: They’ll make sure your hearing aids are properly adjusted to fit your ears and meet your specific needs.
Extending Hearing Aid Life
To extend the life of your hearing aids, it is essential to establish a consistent cleaning routine. Think of it like washing your car – you wouldn’t buy a new one and then never clean it, right? Daily cleaning helps prevent earwax and moisture buildup, which can damage the sensitive electronics. Start by gently brushing the microphone cover with a soft-bristled brush and wiping down the entire hearing aid with a soft cloth every morning. For weekly detail cleaning, use a wax pick or wire loop to remove stubborn deposits, but avoid the microphone and receiver ports. Always store your hearing aids in a dry, cool place and open the battery compartment at night to let moisture escape. Proper battery care and moisture protection are key to prolonging the life of your hearing aids. Regular professional cleanings every six to twelve months will also help maintain peak performance.
Conclusion
Clean your hearing aids daily with a soft-bristled brush and microfiber cloth. Use a wax removal tool and dehumidifier for deeper cleaning. Be gentle with delicate parts and avoid chemicals. For ITE hearing aids, focus on the receiver and microphone. For BTE hearing aids, clean the earmold and tubing. Get professional check-ups every three to six months. Regular cleaning and maintenance will keep your hearing aids in top shape and extend their lifespan.